How to Install PyRunner on Coolify
I built PyRunner because I wanted to stop renting my automations from Zapier and run them on my own server, in plain Python. Upload a script, schedule it, watch it run. That's the whole platform.
Think of it as a self-hosted alternative to Zapier, Make, and n8n. The difference: every step is just Python. Anything a Python library can do, your automation can do. And since Claude writes most of the Python for me, a new automation takes minutes, not an afternoon.
It handles the boring parts too: an isolated virtual environment per script, encrypted secrets, full run logs with stdout and stderr, scheduling that's manual or on an interval or daily at a set time, and alerts over email, webhook, or Telegram when a job finishes or fails.
This guide installs it on a Coolify v4 server in about three minutes, using the official Docker Compose file.
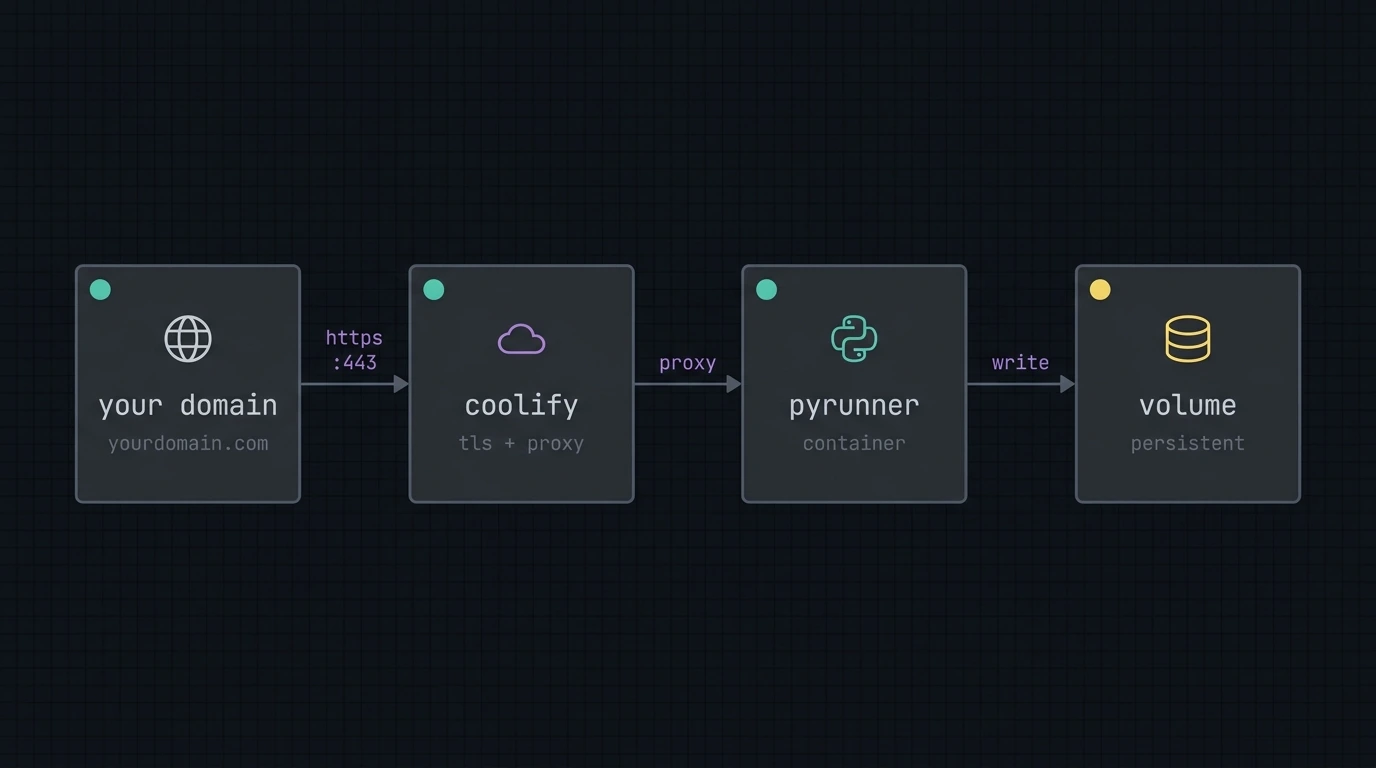
TL;DR: Install PyRunner on your own Coolify server. Point Coolify at the repo, paste three environment variables, set your domain, deploy. The volume, port, healthcheck, and SSL are already in the compose file. You don't touch them.
By the end of this guide you'll have:
- PyRunner running on your own Coolify server
- Your own domain with automatic HTTPS
- A persistent volume that Coolify creates for you (no manual setup)
- One-click updates whenever a new PyRunner version ships
What do you need to install PyRunner on Coolify?
Three things, all standard for any self-hosted app:
- Coolify v4.x running on a server you control. If you don't have it yet, follow the Coolify install guide first, then come back here.
- A server with at least 1 GB RAM. In my experience, 2 GB feels less cramped once you add a few jobs. I run mine on Contabo, but Hetzner or any VPS you like works fine.
- A domain pointed at your Coolify server (set an
Arecord at your DNS provider). No domain yet? Coolify will give you a freesslip.iosubdomain you can use to start.
That's the whole list. Let's get started.
Your PyRunner domain (optional)
Drop in the domain you'll use for PyRunner. We'll plug it into every copyable block on this page so you can paste with no edits.
Values stay in your browser only. Nothing leaves this page.
Step 1: Generate two secret keys
PyRunner needs two keys before it can start:
SECRET_KEY: Django uses this for sessions and CSRF protection.ENCRYPTION_KEY: This encrypts every secret you store inside PyRunner (API tokens, env vars, anything sensitive).
Use the generators below. Both keys are made in your browser, so they never leave this page. Copy them somewhere safe. I keep mine in a password manager. You'll paste them into Coolify in a minute.
Click "generate" to create a new key…
Generated client-side with the Web Crypto API. Nothing is sent to any server.
Click "generate" to create a new key…
32 random bytes, URL-safe base64. Compatible with Python's cryptography.fernet.Fernet.
Do not lose the ENCRYPTION_KEY. Think of it as the only key to a safe. Every secret you store in PyRunner goes in that safe. Lose the key and the safe is welded shut. Gone. So put it in a password manager now, not later.
Step 2: Create the resource in Coolify
Open Coolify and go to Projects → your project → + New → Public Repository.
Fill in:
Repository URL
https://github.com/hassancs91/PyRunner
Branch: main
Click Check Repository.
On the next screen, set:
Build Pack: Docker Compose
Docker Compose Location
/docker-compose.coolify.yml
Click Save.
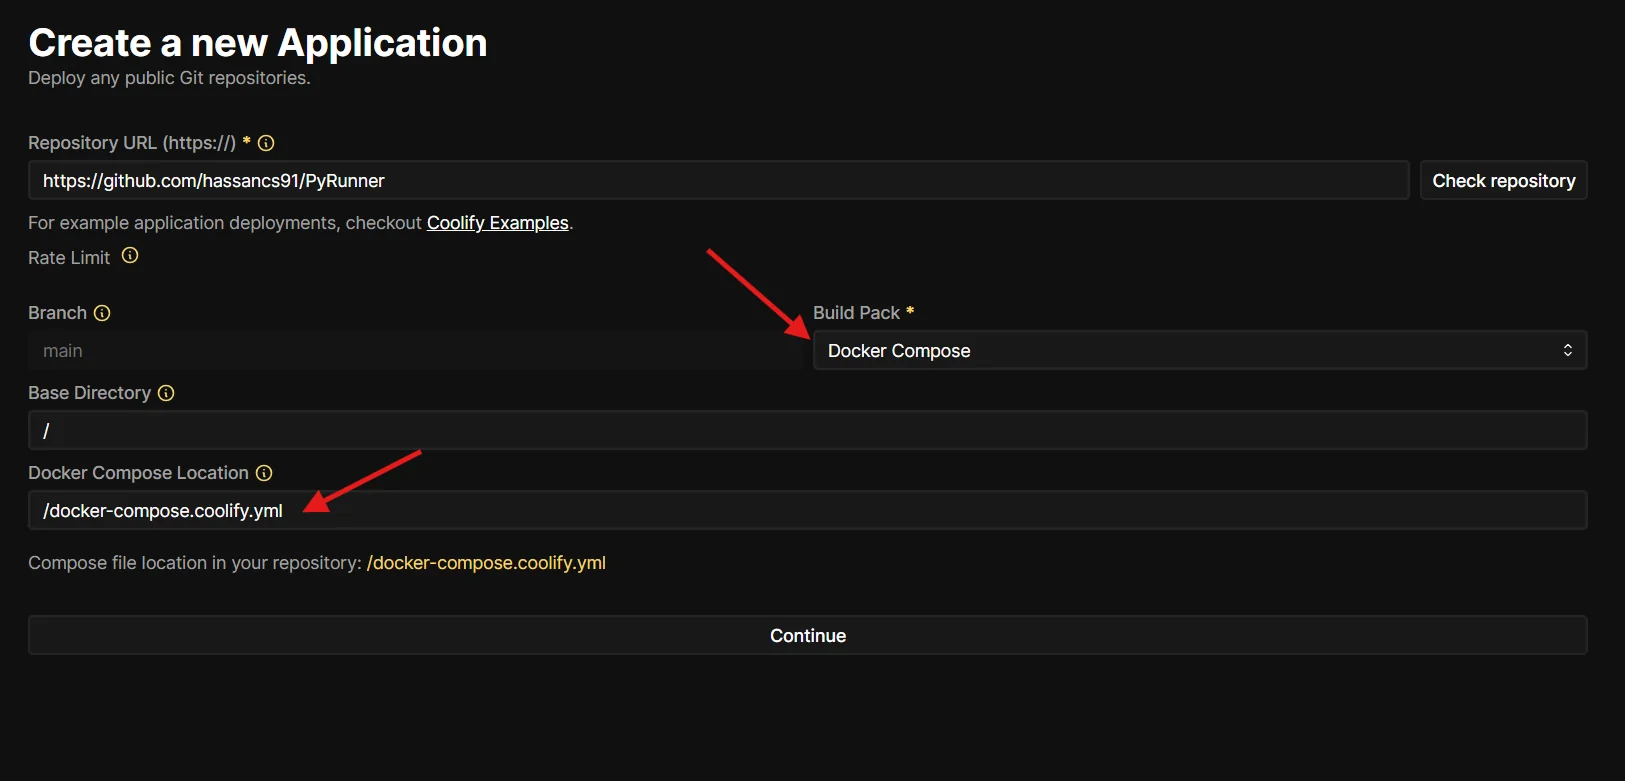
What just happened: Coolify is now reading the pre-tuned compose file from the PyRunner repo. The volume, port, healthcheck, and SSL handling are all already defined in that file. You don't have to configure any of them manually.
Step 3: Set three environment variables
Open the Environment Variables tab for the resource.
You'll notice a variable called SERVICE_FQDN_PYRUNNER_8000 already there, auto-populated by Coolify. Leave it alone. That's the variable that wires up your domain to the right container port.
Add these three:
| Key | Value |
|---|---|
SECRET_KEY | (paste from Step 1) |
ENCRYPTION_KEY | (paste from Step 1) |
ALLOWED_HOSTS | localhost,127.0.0.1,pyrunner.example.com (add your real domain to the end) |
Toggle the Secret flag on SECRET_KEY and ENCRYPTION_KEY so they stay masked in the UI and logs.
If your Coolify is in Developer mode, copy this block and paste it. The values stay in sync with the keys you generated above and the domain you set at the top:
SECRET_KEY=your-secret-key-here
ENCRYPTION_KEY=your-encryption-key-here
ALLOWED_HOSTS=localhost,127.0.0.1,pyrunner.example.com

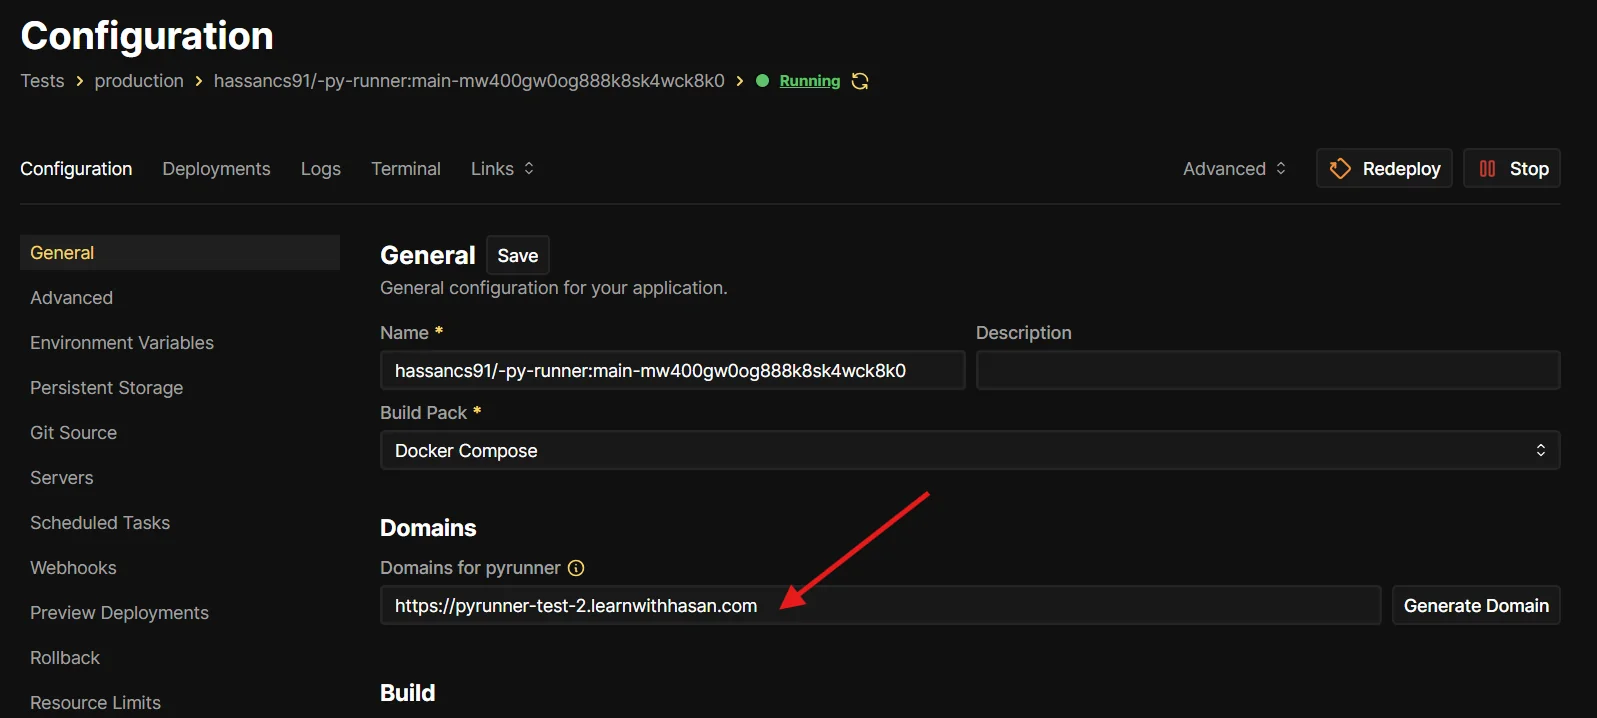
.env block as a single paste.Step 4: Set your domain
Go back to the main Configuration page for the resource. You'll see a Domains for pyrunner field.
Enter your domain (for example https://pyrunner.example.com) and click Save.
Coolify will automatically request an SSL certificate from Let's Encrypt once you deploy. You don't need to do anything else for HTTPS.
If you don't have a custom domain ready, click Generate Domain and Coolify gives you a free sslip.io URL.
Step 5: Deploy
Click Redeploy (top right).
The first deploy takes about a minute. Coolify pulls the image, creates the volume, and runs the database migrations. Watch the logs:
- You should see
PyRunner is ready!followed by Gunicorn startup messages on port 8000. - If you see
ERROR: SECRET_KEY is requiredorERROR: ENCRYPTION_KEY is required, go back to Step 3 and check your env vars.
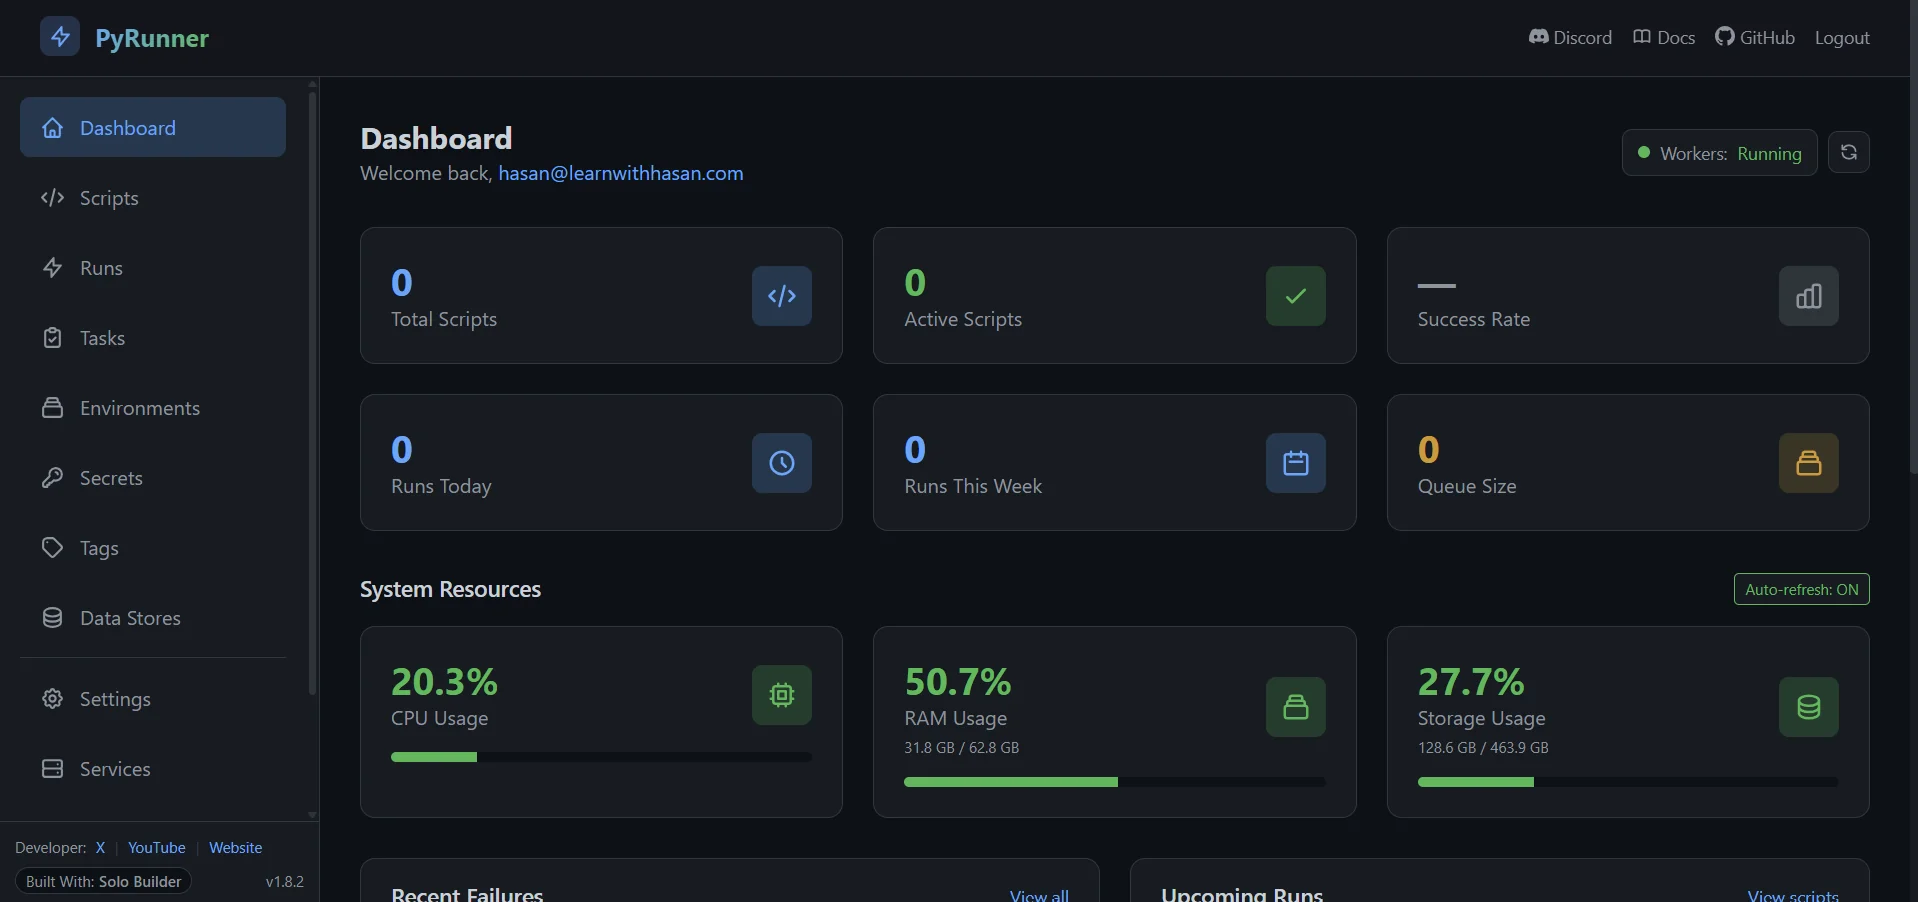
When the healthcheck turns green, open your domain in a browser. PyRunner runs a quick first-time setup. Pick a username, email, and password for your admin account. Then it drops you on the dashboard.
Email setup (do this next)
PyRunner sends email for two things: password resets, and the messages your scripts fire off. With no email set up, none of that leaves the server. So do this next.
Inside the app:
- Go to Settings → Email.
- Pick one:
- Resend (simplest): paste your Resend API key, set the From address, toggle Use Resend on.
- SMTP: fill in your SMTP host, port, username, password, and From address. Works with Mailgun, SendGrid, Postmark, or your own SMTP server.
- Send a test email from the same page to confirm it works.
Done. PyRunner is running on your own server, your own domain, everything persistent.
When things go wrong
Here are the issues I see most often:
| Symptom | Fix |
|---|---|
DisallowedHost error in the browser |
Add your domain to ALLOWED_HOSTS (comma-separated), redeploy |
| 502 Bad Gateway right after deploy | Wait 60 seconds. Migrations are still running. The healthcheck has a 60-second grace period |
| "No available server" from Coolify's proxy | The container is running but routing failed. Try restarting the proxy: Settings → Proxy → Restart Proxy |
Container restart loop, log says SECRET_KEY is required |
The env var is missing or empty. Set it and redeploy |
Container restart loop, log says ENCRYPTION_KEY is required |
Generate one (Step 1), set it, redeploy |
| Login emails never arrive | Email is still on the default console backend. Configure SMTP or Resend in Settings → Email |
Need help, or want a feature?
Hop into the PyRunner Discord. Fastest way to get unstuck, share what you've built, and shape what ships next.
Like PyRunner? Star the repo.
Drop a star on PyRunner on GitHub. Helps other builders find it.
Updating PyRunner
When a new version ships to Docker Hub:
- Open your PyRunner resource in Coolify.
- Click Redeploy with Pull latest image toggled on.
The volume keeps your data safe across redeploys. Migrations run automatically when the new container starts.
FAQ
Why am I getting a DisallowedHost error after installing PyRunner on Coolify?
Your domain isn't in the ALLOWED_HOSTS variable yet. Add it to the comma-separated list (like localhost,127.0.0.1,pyrunner.example.com) and redeploy.
Why is PyRunner returning a 502 Bad Gateway right after deploy?
Migrations are still running. The healthcheck waits 60 seconds before it complains. Give it a minute, then refresh.
Coolify shows "No available server" but the PyRunner container is running. What now?
The container is up, but the proxy didn't catch it. Restart Coolify's proxy: Settings → Proxy → Restart Proxy.
Why does PyRunner crash with "SECRET_KEY is required"?
The SECRET_KEY variable is missing or empty. Generate a 50-character key (Step 1), add it under Environment Variables in Coolify, and redeploy.
Why does PyRunner crash with "ENCRYPTION_KEY is required"?
PyRunner needs a Fernet key to encrypt your stored secrets. Generate one (Step 1), set it as ENCRYPTION_KEY in Coolify, and redeploy. Keep it safe. Lose it, and every stored secret is gone for good.
Why are PyRunner login emails not arriving?
Email is still on Django's console backend, so nothing actually sends. Set up SMTP or Resend under Settings → Email, then send a test message from the same page.
What's next
You now have PyRunner running on your own server. Now build something. A script that checks a page each morning and Telegrams you what changed. A nightly database backup. A job that pulls an API and drops the data in a sheet. Whatever you'd normally pay Zapier for. Ask Claude to write the Python, paste it in, set a schedule.
Want the whole stack on video instead of guide by guide? That's what my Self Hosting 2.0 is for. The free guides still get you there. The course just saves you the trial and error.
More self-hosting guides are on the way: Postal SMTP, Coolify from scratch, backups, hardening.
ship it.